This guide will help you set up and customize the floating video widget for your PingVid plugin.
After installing and activating the plugin, navigate to PingVid → Settings in your WordPress dashboard. Under the General tab, you’ll find all the options related to how the video appears and behaves across your site.
While most options are straightforward, this section walks you through the key settings to ensure your video widget displays smoothly, works reliably, and blends seamlessly with your site’s design.
This documentation covers all available settings, including features exclusive to the Pro version. The Free version provides the essential functionality out of the box, while the Pro version unlocks advanced features such as individual post-level overrides and more layout flexibility.
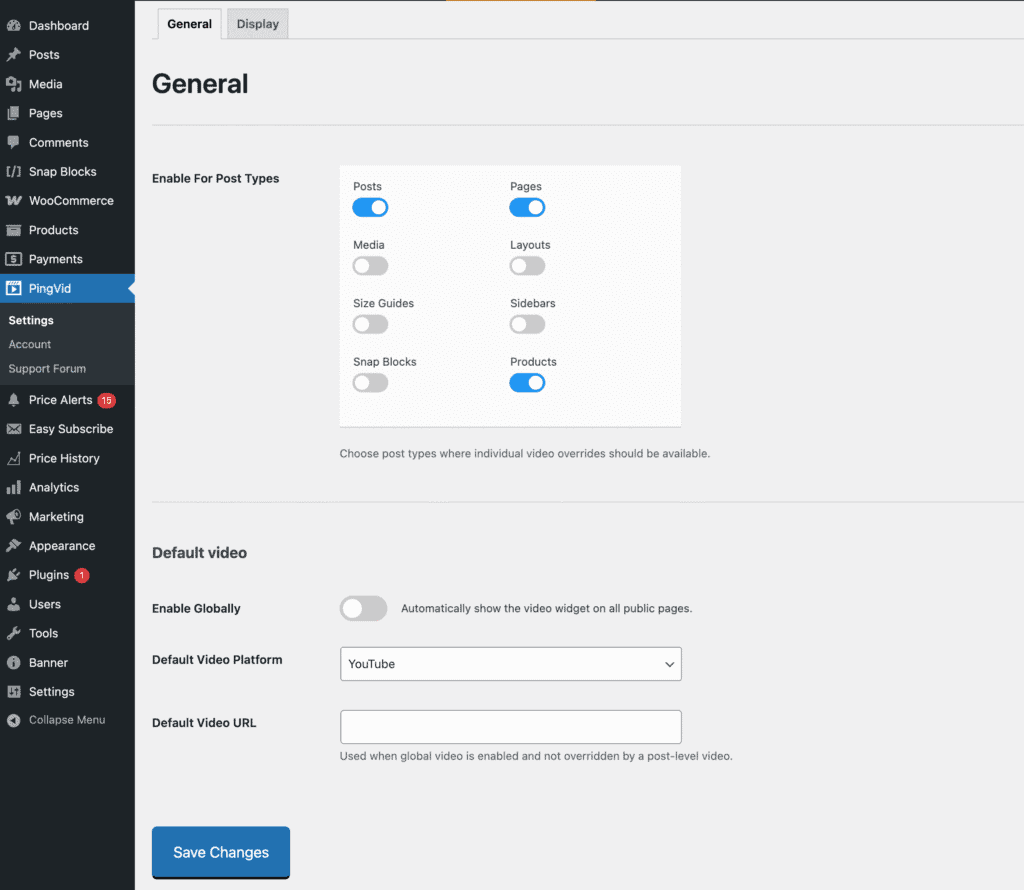
Enable For Post Types
Choose post types where individual video overrides should be available. When enabled, a metabox will appear on those post types, allowing you to configure per-post video settings.
Note: This is a Pro feature. We’ll cover individual video overrides in a separate section.
Default Video
Set up a global video that appears across your site. These settings apply when no individual post-level overrides are used.
Enable Globally
Automatically show the video widget on all public pages.
Default Video Platform
Select the platform for the global video. Currently supported: YouTube.
Default Video URL
Enter the URL of the video to be displayed globally. This will be used when the global video is enabled and not overridden by a post-level video.