Auto Insert allows you to automatically place a Snap Block in specific locations across your site — without using shortcodes or manually adding widgets.
Instead of inserting blocks page by page, you choose where the block should appear and under which conditions, and Snap Blocks handles the rest. This makes it easy to display content in consistent positions such as product pages, checkout, thank-you pages, blog posts, or specific pages — all from one central place.
Auto Insert is a PRO feature.
The following section explains how automatic placement and display conditions work and how to configure them. To unlock automatic placement and conditional display options, upgrade to Snap Blocks PRO.
Opening Auto Insert Settings
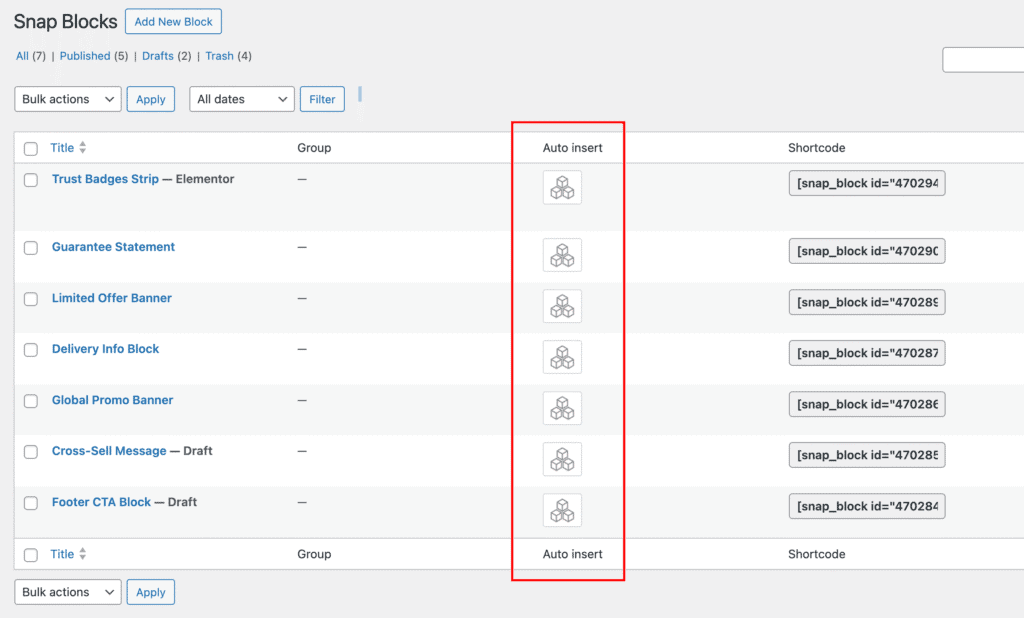
To configure Auto Insert, go to Snap Blocks → All Blocks.
In the Auto Insert column, each block has a button that opens the settings modal. Click this button to define where and how the block should be displayed.
Auto Insert Modal Overview
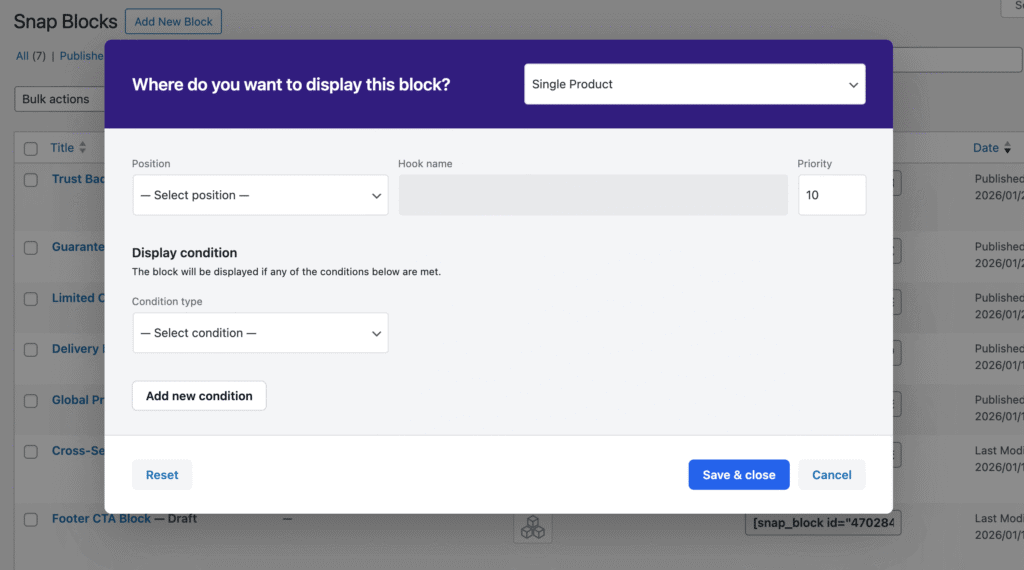
Inside the Auto Insert modal, you configure three main things:
- Where the block should be displayed (page context)
- Position within that page (hook location)
- Conditions that control when the block appears
Together, these settings determine exactly where and under which circumstances the block will be automatically inserted.
Where do you want to display this block?
This setting defines the page context where the block will be automatically inserted.
You can choose from supported WooCommerce pages such as: Single Product, Product Archives, Cart, Checkout, Thank You, and My Account.
As well as WordPress pages like: Single Post, Pages, and Post Archives.
The selected context determines where the block is eligible to appear.
Note: We continuously expand supported contexts as the plugin evolves.
If you’re missing a specific page or location, feel free to contact us with a suggestion — we’re happy to consider adding it.
Position
The available Position options depend on the selected page context.
Each position corresponds to a specific hook within that page layout. When a position is selected, its actual hook name is shown in the Hook Name field.
Important: In some cases, a selected position may not display anything. This can happen if a custom theme or another plugin overrides the default template and does not include the corresponding hook.
If that occurs, try selecting a different position or contact your theme developer for clarification.
Priority
Priority controls the order in which content is displayed when multiple elements are attached to the same hook:
- Lower numbers appear earlier
- Higher numbers appear later
In most cases, the default value (10) works perfectly. Adjusting priority becomes useful when you need the block to appear before or after other elements that use the same position.
Enter Hook Name Manually
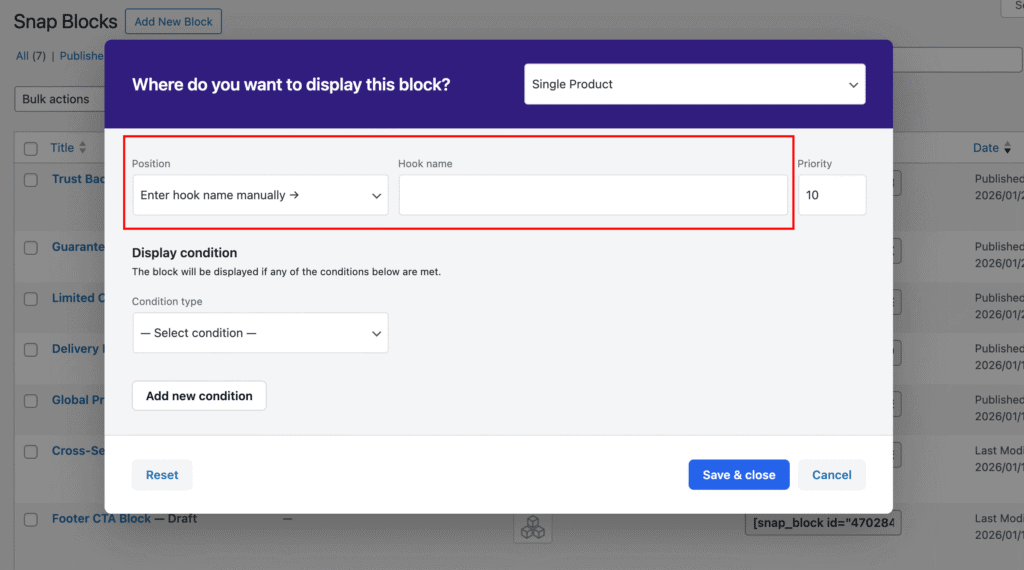
The last option in the Position dropdown is “Enter hook name manually.”
When selected, the Hook Name field becomes editable, allowing you to enter a custom hook name.
This option is useful if:
- You’re working with a custom theme
- A plugin provides its own hooks
- You need to target a specific hook not listed in the predefined positions
It gives you full control over where the block is injected.
Important: Some hooks are placed inside specific HTML structures (for example inside a <table> or <tr> element).
If a block is inserted into such a hook, the surrounding markup may not match the expected structure and could affect the layout.
When using a custom hook, make sure it is suitable for standalone content output.
Conditions
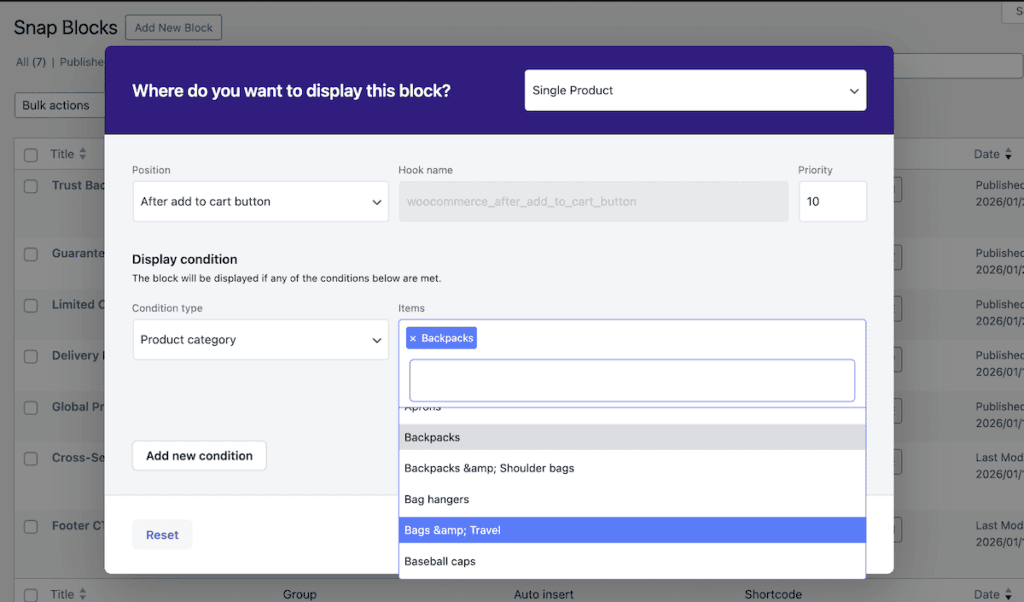
Conditions control when the block will be displayed.
A block will be shown if any of the defined conditions are met.
Available condition types depend on the selected context.
For example:
- Single Product
- All products
- Specific products
- Product taxonomies (such as category, tag, brand)
- Product or Post Archives
- Taxonomy-based conditions
- Pages
- All pages
- Specific pages
This allows you to target content precisely — whether you want it visible everywhere within a context or only on selected items.
Multiple Conditions
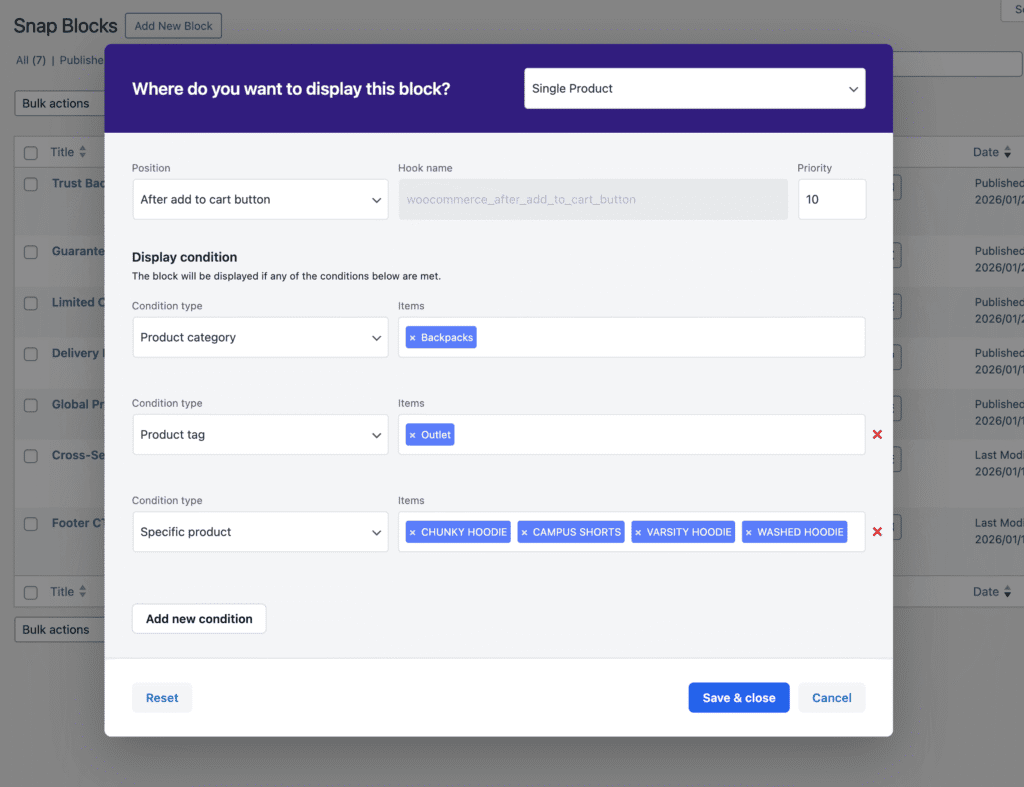
You can add more than one condition by clicking the Add new condition button.
This allows you to combine different rules within the same context. For example, you can display a block on:
- Products in a specific category
- Products with a specific tag
- Selected individual products
The block will be displayed if any of the added conditions match.
Contexts Without Conditions
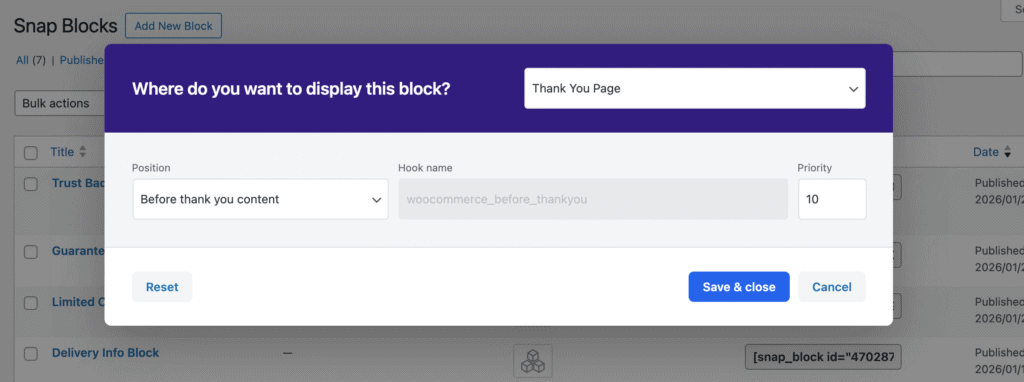
Some contexts do not include condition options.
For pages such as Cart, Checkout, Thank You, and My Account, the block is either displayed on that page or not — there are no additional filtering rules.
In these cases, you only need to select the desired Position, and the block will be inserted on that page.