UTT Import uses a two-step import process. First, product data is fetched and prepared from the UTT API. Once the data is ready, products can be imported into WooCommerce.
Manual Import (Basic Plan)
The manual import process is primarily used during the initial store setup and is the standard import method available on the Basic plan.
Advanced plan users will typically perform the first import manually and then switch to automated background or scheduled imports for ongoing synchronization.
Step 1: Prepare Import Data
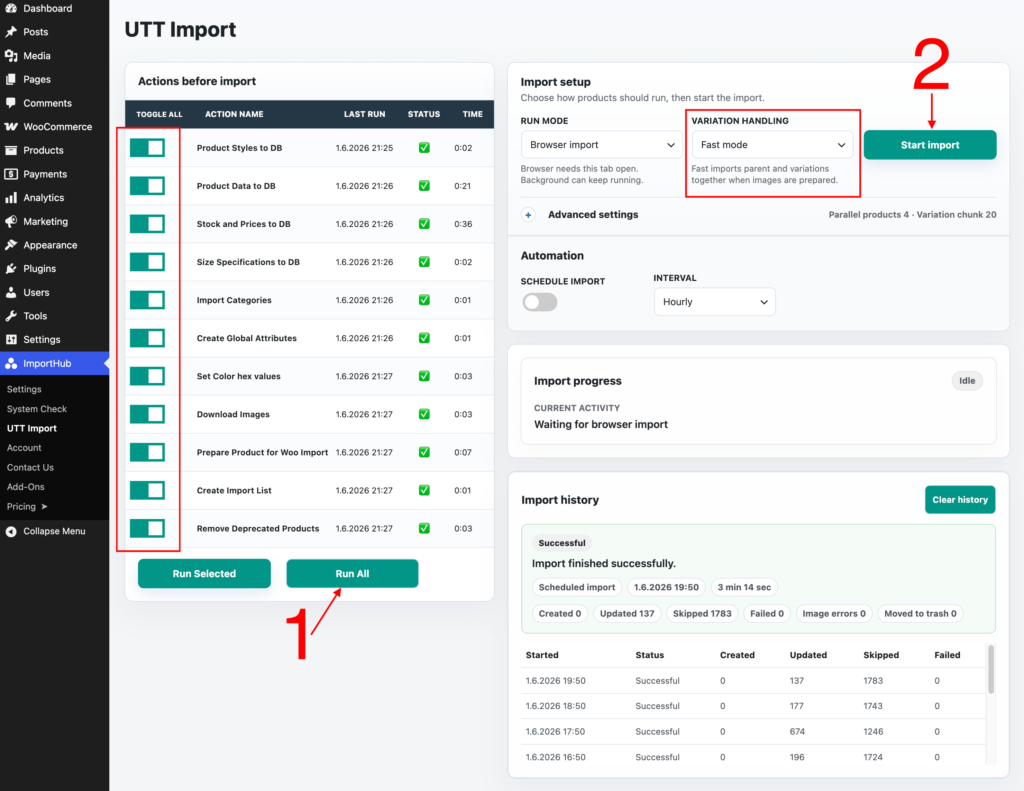
Before importing products, run the preparation actions listed on the left side of the screen.
For most stores, simply click Run All and wait for all actions to complete.
This will:
- Download product data from UTT
- Download stock and pricing information
- Create categories and attributes
- Download images
- Prepare products for WooCommerce
- Build the import list
Once all actions have finished successfully, your store is ready for product import.
Step 2: Import Products
After the preparation process is complete, click Start Import to begin importing products into WooCommerce.
The browser tab must remain open until the import is finished.
For the initial import, we recommend using Safe Mode under Variation Handling. Once the first import has completed successfully, you can switch to Fast Mode for future imports.
For most stores, the recommended settings are:
- Variation Handling: Fast Mode
- Variation Chunk Size: 20-50
- Parallel Products: 4
These values provide a good balance between speed and server load on most hosting environments. If your server is particularly powerful, you can experiment with higher values, but the optimal settings will vary depending on available resources.
Run Mode: Background Import
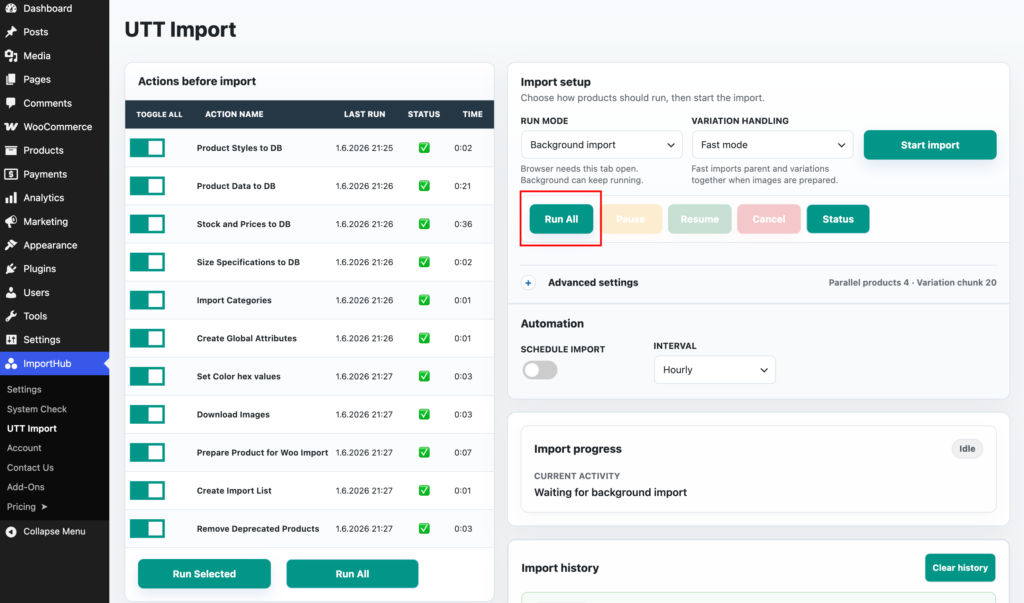
Background Import runs the import process on the server, allowing it to continue even after you close the browser or leave the ImportHub page.
The simplest approach is to select Background Import and click Run All. ImportHub will automatically execute all preparation actions, download any missing images, create the import list, and then start importing products into WooCommerce.
Alternatively, you can run the preparation actions manually, just as you would with a Browser Import. Once all actions have completed successfully, click Start Import to begin importing products in the background.
For most stores, we recommend using Run All, as it requires no manual intervention and completes the entire import process automatically.
Automation
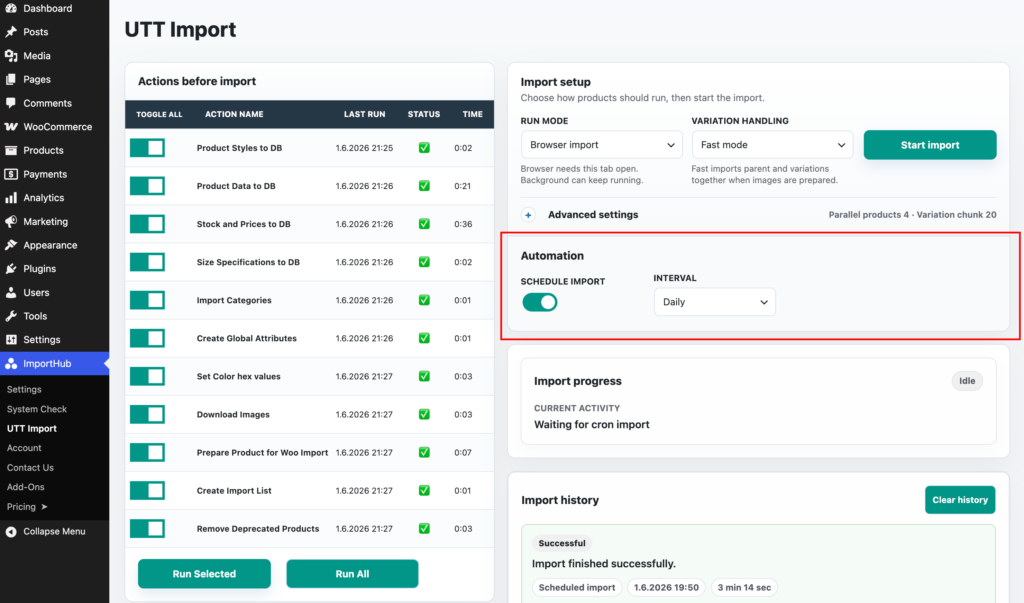
Automatic imports can be configured from the Automation section.
To enable scheduled imports:
- Enable Schedule Import.
- Select the desired import interval: Hourly, Twicedaily, Daily, Weekly.
When the scheduled import runs, ImportHub automatically executes the complete import process in the background, including data updates, image downloads, and product synchronization.
Using a Real Server Cron
By default, WordPress relies on WP-Cron, which only runs when your website receives visitors. On low-traffic stores, this can cause scheduled imports to run late or be missed entirely.
For the most reliable automation, we recommend disabling WP-Cron and configuring a real server cron job instead.
Add the following line to your wp-config.php file:
define( 'DISABLE_WP_CRON', true );
Then create a server cron job that requests:
https://your-domain.com/wp-cron.php
every 5 minutes.
Most hosting providers offer a Cron Jobs section in their control panel where this can be configured.
Using a real server cron ensures scheduled imports run consistently, regardless of website traffic.
For example:
*/5 * * * * cd /path/to/public_html && wp cron event run --due-now
This executes all pending WordPress scheduled tasks, including ImportHub scheduled imports.
The exact command may vary depending on your hosting environment and where WP-CLI is installed.